NEW BLOG LOCATIONS

I've moved to another two blogs, one on writing, and one on general stuff like this one. Please come visit! MY NEW BLOGS:

http://amydeardon1.blogspot.com

http://thestorytemplate.blogspot.com


Showing posts with label format a manuscript for Kindle. Show all posts

Friday, February 26, 2010

How to Publish on Kindle Part Four

Now that the RTF Word document of your book is ready, it's time to upload and publish!
First, go to amazon.com home page. On the left hand side check out the menus. Under the one marked "Features and Services," hit the "publish on Kindle" tab. You'll be taken to a page marked Amazon Kindle's Publishing Program. Hit the tab for "Digital Text Platform (DTP)."

On the right top of the page is the sign in button. Hit it and/or change the ID to the one you want to use for Kindle pubbing.

On the next page, there are several tabs at the top. Start by completing your account information ("My Account").

Next, go to "My Shelf." Hit the "new book" tab. There are four areas you'll need to complete before you can publish your book on Kindle.

The first one, "Product Details," is straightforward. You have to put in a 4000 character description of your book, which is in the range of 600-650 words. For mine I did the back cover description, a brief author bio, and 3 endorsements. NOTE: the description was run together without paragraph breaks for my print book listing. Therefore before publishing this one on kindle, I divided the sections by putting an asterisk after each part. Also, make sure that every period has a space after it. You'll be OK then if you end up with one big text block.

You'll also have to decide whether you want to enable DRM (Digital Rights Management) or not. Amazon is singularly unhelpful in assisting with a decision. I wrote about this in Part One, but basically the DRM means how easily your book can be downloaded to other devices once it's been bought. I decided to disable the DRM, therefore making the book easily transferable multiple times -- in the argument of obscurity versus theft, I'm erring on the side of theft. (Like anyone's going to want to steal my deathless words anyway :-)

The second section, "Confirm Content Rights," simply affirms that you have the rights to this manuscript to publish it.

The third section, "Upload and Preview," is where you upload your beautifully formatted RTF file. Go for it. When it's finished (it took me about 5 minutes), take a look at the preview, and check it carefully. If you notice something glitchy, figure out why and fix it in your manuscript, then reupload your manuscript. I did this about 4 times before I was completely happy.

Finally, in section four, "Enter Suggested Retail Price," you put down what you want to charge. I already discussed viral (free) e-books in part one, but unfortunately you can't do this on Kindle since the minimum price you can charge is $1. NYTimes bestsellers go for about $10. Check out the prices and figure out what you want to charge. For what it's worth, I chose $4.99 but have no data yet to see if that was a good judgment call. I figure, I can always change it.

And there you go! When you are completely, 100% happy with what you have (especially the preview), hit the publish button.

If you have any questions or problems with listing on amazon, rotsa ruck -- when I had my print book put up, I found it notoriously difficult to have amazon resolve problems in the listing. The bad part is they don't have phone numbers easily available, so you'll drive yourself batty sending an email and getting a canned response that doesn't really address the problem. Still, if you're persistent, eventually you should be able to get someone to pay attention. Amazon has a special email for the kindle: dtp-feedback@amazon.com. You also can email the Digital Rights people -- they normally aren't involved for indie publishers, but it doesn't hurt: digitalrights@amazon.com.

It'll take a few days (for me it's been about a week and it's still not up) for amazon to process your ebook and actually put it on the site so that it can be purchased. In the meantime, you've done a great job! Now, get back to writing the NEXT Great American Novel.

Wednesday, February 24, 2010

How to Publish on Kindle Part Three

Today I'll be going over putting the final touches into formatting your manuscript for Kindle: the cover image, front matter, back matter, and illustrations. Actually, let me take these in reverse order, from easiest to most difficult.

ILLUSTRATIONS: The DTP of the Kindle does not do illustrations well. One or two may be fine, but the more and more complex they are, the iffier the results. Also, the Kindle only displays in black and white. I'd suggest that you either get rid of the illustrations, or use the HTML platform to format your book.

BACK MATTER: This includes things like an author's note, resources for more study, historical context, citations, or anything else that belongs after the main text is finished. To do these, simply format as you did the body of the book: put a page break after "~The End~" and between each section, then justify and format the text. One thing to be aware of for the Kindle is that the user can alter the size of the displayed text, so you therefore don't want to have too many lines on each page unless you don't care how they might be broken. If there are different sections on one page you may want to break between each one with a page break. For example, I had a "Point/Counterpoint" page that I broke into two.

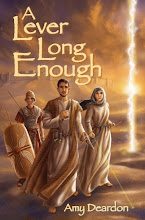
FRONT MATTER: open any book you have on your shelf to look at the front matter. Since you're doing a Kindle you don't need as many pages, but you DO need to include the important information. The first page after your cover illustration should be a title page, showing your TITLE (line break) by -or- A Novel (in italics) (line break) your name. You'll also need a year copyright date, all rights reserved notice, publisher (if you have one), and print ISBN if you have one. The formatting is similar to the body. For my title, I did A LEVER LONG ENOUGH in all bolded caps and made the first letter of each word 26 font, the other letters 24 font (remember, the DTP isn't good with fancy formatting so I couldn't do "small caps" under the format options). "A Novel" is 22 font plain, and my name Amy Deardon is 26 font plain. Next, since I have a publishing icon I did a quick image of icon plus the text for publisher, city and state, and pasted it below my name. I finished with the copyright, print ISBN, and publisher website.

The next page I did was the back cover copy of the book. One of the hardest things to do is start a book while knowing NOTHING about it except a cover image and maybe a blurb "great book!" (I see this with self-pubbed books, and gosh it annoys me!). Since there is no back cover on a Kindle book, you need to put it here.

The next page I gave my author bio and then a notice that Lever is the 2009 Pluto award winner.

The next page I put an abbreviated list of endorsements (9 of them, spread over 3 pages which I figured was enough without being annoying).

The next page I put an acknowledgement to three gentlemen who especially helped me with the accuracy of this book.

The next page I wrote, "To my family and dear friends" in centered 16 italics font.

The next page I wrote my book's quote: "Give me a lever long enough and a place to stand, and singlehanded I can move the world." -- Archimedes of Syracuse, 287-212 BCE

The next page is chapter one, into the body of the manuscript.

I tried to keep the front matter from being too long/tedious, yet still giving enough information that the person reading the book feels confident that this is worth his time (the author said hopefully...). For this reason I removed another 4 or so endorsements, as well as the two Kindle pages it would take for my individual thanks (husband, children, sisters, their husbands, friends etc.).

COVER ILLUSTRATION: As I mentioned, the Kindle only displays in black and white. Nevertheless, it's still a good idea to make your first page a cover image, since it looks professional. You can use any image you want, provided you have the rights or a license to use it, or it's in the free domain. Some web sites with stock photos available for free or low cost include istockphoto.com, photobucket.com, photoshopsupport.com/resources/stock-photos.html, and sxc.hu. NOTE: I haven't used any of these sites but have heard they are good.

On your cover image, make sure that your book title and author name appear prominently, just like a print book cover. You want to make sure that the image file isn't too big (straddles pages) or it won't load -- so if you try to upload your finished manuscript file with your image to amazon and it won't after about a half hour, try reducing the image file size. Your cover image should be about 3" by 5" or so, and not smaller than 500 pixels on the longest side, with a dpi resolution of 300.

The jpeg file name should contain only lower case letters with no spaces. For example, I named my cover image file aleverlongenough.jpg, and then inserted it into my Word document (look under the "insert" menu for the picture icon). I just used the regular color jpeg of my book and found that it looked fine in the preview, so it's worth a try if you only have a color image.

Finally, make sure the image is centered, and put in a page break right after it.

*

On Friday I'll be talking about how to set up an account and actually upload your book onto the amazon site.

NOTE: The formatting discussed in this blog entry and the previous one were largely adapted from the e-book OUT STANDING IN THE FIELD: The Indie Author’s Two-Step Guide To Publishing In the Kindle Store, by Free Press Publications. It's available free on Smashwords HERE.

Monday, February 22, 2010

How to Publish on Kindle Part Two

The Kindle only accepts a completed manuscript, not a partial, so you need to have finished your book. If you've done this, the next step is to format your manuscript for the Kindle. Amazon has now installed a Digital Text Platform (DTP) that converts a Word file into the HTML-formatted thingy that gets downloaded. If you use this (easy method) you'll need to preview your manuscript before pubbing it, since the DTP can be glitchy. If you find your preview ISN'T right, just reformat the problem in your manuscript, reload your manuscript onto the site, re-preview it, and you should be OK.

BTW Amazon also has an application for computer geeks that works directly with the HTML, but I didn't use it so can't comment on it. I imagine it gives you a little more control and allows you to do fancier things, but really the DTP worked just fine to give me a totally satisfactory kindle book.

Today I'll be covering formatting of the body of your manuscript. The fancy doodahs -- cover image, front matter and back matter we'll do on Wednesday. Remember that your formatting should look like the formatting for a book, not a manuscript to be evaluated by an editor or agent. Also, BTW this IS considered publishing, so if you're trying to submit this manuscript to editors and/or agents for traditional pubbing, you shouldn't put it on kindle.

OK, so open your Word document and save a new copy in an RTF format. This needs to be a single document with all of your chapters, not a single chapter document. The first thing I did was reformat the margins to give me an approximation of what the text might look like on kindle, although of course this won't show once it's downloaded. I used an "A5" paper size which is 5.83" x 8.27" (check your page layout options), then made the margins 3/4 inch on the sides and 1 inch top and bottom.

NOTE: Although it's helpful, you DO NOT HAVE TO reformat your margins! This is only to give you a better visual idea of what your text may look like on the Kindle.

Once you have your margins, remove all hard (tab) indents, and all hard returns except at the ends of paragraphs. If you want to visualize where they are in your manuscript to make it easier to find them, turn on the "view formatting marks" option. If you don't know where this option is, hit the F1 key and type in "format symbols" or "format marks" to find out how to display them. Do the indents through the ruler at the top of the page -- move the top triangle over about half an inch.

Next, select all the text in your document and make it 12 point single spaced. (We'll dress up selected aspects in a few moments). Also, use the same boring serif font for all of your text -- Times New Roman or Garamond. These are the fonts that do best in a book anyway, so don't feel like this is a second-rate choice with the DTP. Don't try tricky fonts, symbols, or fancy formatting (anything beyond bold, italics, and centering text), since the DTP may not be able to convert these. Well, you can try them and then see how they come out on your preview, but don't hold your breath that they'll work. Sad, I know.

Also, make sure that you don't have a blank line between paragraphs, either through two hard returns or through the automatic formatting if you have the new Word (like I do). To take these out of the new Word, first make sure all your text is still selected, then under the Home key at the top, look under the "Paragraph" section. The fifth box with lines shows a box with two arrows pointing up and down. Hit that one. At the bottom of this arrow hit the "remove space from..." tab.

You will not need headers and footers either. Eliminate these from your document. (NOTE: just leaving in blank lines in the header or footer is not sufficient -- get rid of these in the formatting).
Justify all of your text in the document instead of using the ragged right edges.

Next, you'll need to format each chapter. For each chapter heading line, remove that indent on the ruler above the document so that it is flush with the left side. Then, center "Chapter One" or "1" or whatever you're using for your chapter headings, and make it "20 point" and "bold" (or other formatting if you desire). Do a hard return after this. Your text starts on the next line. (NOTE: for all centering, including in your text body, always eliminate the indent on the ruler so that the line is flush left).

At the end of chapter one, insert a page break. Do this even if your text ends on the last line of the page and this adds a blank page to your manuscript. Remember, the formatting YOU see is not the formatting the Kindle sees.

Go through your manuscript to finish all of the chapter headings. At the end of the final chapter, put in a hard return, then center ~THE END~ in 16 point text.

If you have offset passages of your text -- for example a letter that your heroine reads -- center this text and italicize it, or otherwise format it so that it looks good to you. Again, no fancy fonts.
I think this should do it for today. If you have any questions, just leave a comment and I'll answer it if I can.

Friday, February 19, 2010

How to Publish on Kindle Part One

Soon after Lever came out, I asked a company if they might be able to convert my book into a Kindle edition since I knew there were strict requirements of HTML formatting, special features, etc. The representative told me they could do it for $35 -- not so bad -- but they'd also take 35% of the retail price for each sale. Well, since Amazon only PAYS 35% of retail as a royalty for the book, I figured, no thank you. Other (small) publishers I talked with also didn't know how to do Kindle. Life went on with busy things, and I didn't continue to pursue this.

Until now! I'm happy to say that I've just published A Lever Long Enough in a Kindle format. I did this myself, learning how through a fortuitous mention on a writer's loop and a follow-up question, followed by a little bit of research -- Amazon has worked to make Kindle formatting more accessible to small- and self-publishers, even individuals, so if you have a book you'd like to offer for sale on Kindle, and you have the rights, well, now it's pretty easy.

I'm sure there are other summaries like this out there, but figure maybe this will be useful also. I'm going to spread this topic over a few blog entries since there's enough information that I can't do it in one go.

For today, the first question you might want to ask yourself is if you really want to do Kindle. On the positive side, it costs nothing to list your book, and amazon automatically retails your sales and deposits the money directly into your account. A downside is that amazon does not pay into Paypal accounts, only checking accounts, so to create an account you need to provide your name, checking account number, and social security number or EIN. Also, remember that any manuscript on Kindle is considered PUBLISHED so if you're trying to find an agent or editor for your work to traditionally publish, you don't want to put it on Kindle.

You also have to realize that (surprise) as a self-publisher you are working at a disadvantage to traditional publishers, since you MUST charge at least $0.99 for your book to download. This may seem counterintuitive, but charging money may ultimately make your book less financially productive -- at least by the theory that having your book go viral (where it gets into the hands of as many people as possible) leads to more sales. This strategy is according to marketing guru John Kremer who has recently opened two free ebook sites for fiction HERE and nonfiction HERE. I don't know myself. The point is, though, that if you DO want to try the viral strategy here, you can't. Furthermore, since there are many free ebooks from Kindle already from traditional publishers, you can't compete.

But let's not moan about things that can't be changed. Another thing you need to know, as mentioned above, is that you get 35% of the sale price of each book. Amazon of course reserves the right to change prices and offer discounts etc., but I wouldn't count on their doing anything to your favor. For Lever, Jean and I thought hard about what price to charge, and after checking out Kindle listings etc. decided to put it at $4.95. The print book is available for a little under $13. We could have charged a dollar, but figured this was selling myself short -- after all I worked darned hard to get it finished!

Another decision I had to make was whether to enable DRM (Digital Rights Management) or not. The Amazon upload site was less than helpful; it only said:

"You may choose, on a per title basis, to have us apply DRM (Digital Rights Management) technology which is intended to inhibit unauthorized access to or copying of digital content files for titles. Once your title is published, this setting cannot be changed."

OK. I googled DRM with Kindle and think that, in the real world, this means that with DRM your book can be downloaded only a small number of times, or (if DRM is disabled) that it can be repeatedly transferred ad infinitum, for example when the purchaser adds a new device to his account, or (gasp!) he transfers the book to a friend's Kindle. I decided not to enable DRM, since I figure it's to my advantage to not frustrate people, and also to have as many people and devices read Lever as possible -- a little towards Kremer's view, in which he sees obscurity more of a danger that theft.

OK, that's enough for today. Next week I'll give specifics about how to actually get your book uploaded onto amazon. And BTW, after seeing the preview and how easy my book is to read, I've decided I want a Kindle too :-)